Ski Boot Fitting Tips Your Ultimate Guide to Comfort and Performance
Hey there, fellow snow enthusiasts! Ever had a day on the slopes ruined by agonizing foot pain? Or maybe you've felt like your skis just aren't responding the way you want them to? Chances are, your ski boots are the culprit. A proper ski boot fit isn't just about comfort; it's absolutely crucial for performance, control, and preventing injuries. Think of your boots as the direct link between your body and your skis. If that connection is sloppy or painful, your skiing will suffer. This guide is going to dive deep into everything you need to know about getting that perfect fit, from understanding boot anatomy to custom solutions and even some top product recommendations.
Understanding Ski Boot Anatomy The Foundation of Fit
Before we talk about fitting, let's quickly break down what makes up a ski boot. Knowing these parts will help you understand where potential fit issues might arise and what adjustments can be made.
The Shell The Outer Layer and Its Importance
This is the rigid plastic exterior of the boot. It's the primary component responsible for transmitting your movements to the ski. The shell's fit is paramount. It should be snug, but not painfully tight. When you're trying on boots, the shell fit is often assessed first, sometimes even before putting your foot in the liner. This is called a 'shell check' or 'shell fit'. You remove the liner, put your foot in the empty shell, and push your toes forward until they just touch the front. You should then be able to fit about 1.5 to 2 fingers (roughly 1.5-2 cm) between your heel and the back of the shell. Any more or less, and the shell might be the wrong size.
The Liner The Inner Comfort Layer
The liner is the soft, padded inner boot that provides cushioning, insulation, and a comfortable interface with your foot. Most modern liners are heat-moldable, meaning they can be heated up and then molded to the shape of your foot for a more custom fit. This is a game-changer for comfort and precision. Some high-end boots come with custom foam-injected liners for the ultimate personalized fit.
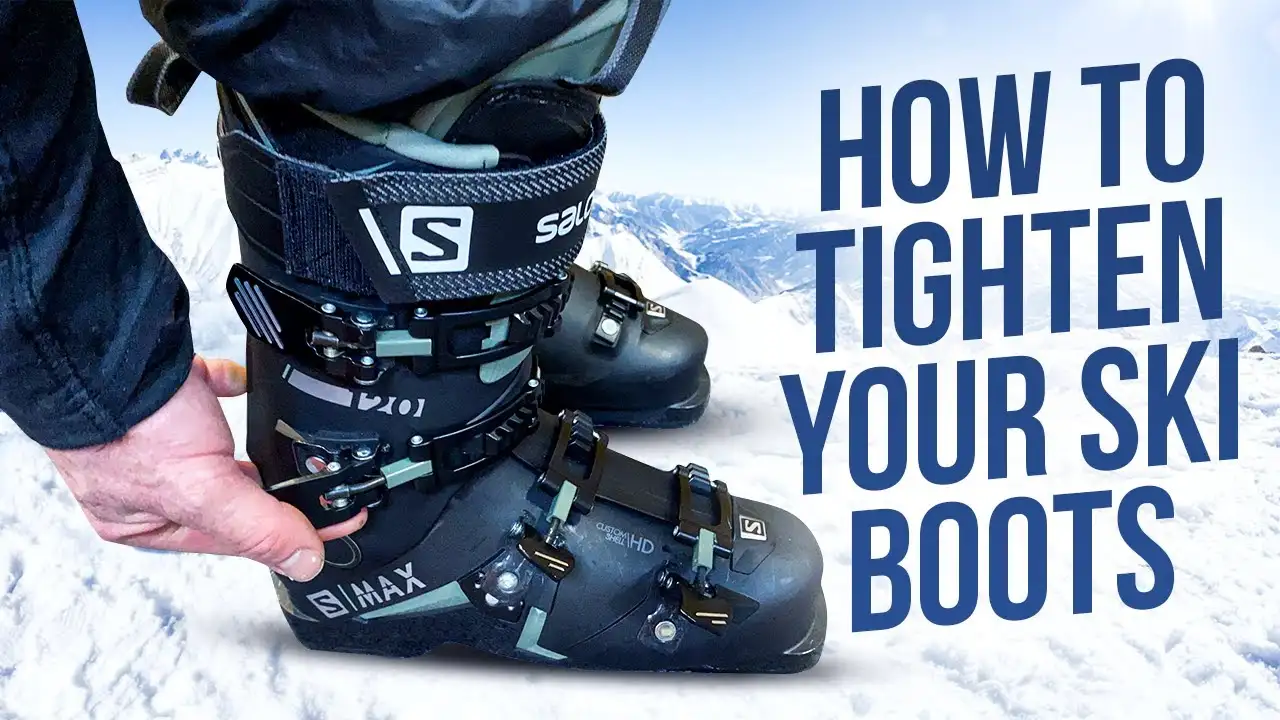
The Buckles and Power Strap Securing Your Foot
These are what secure your foot within the boot. Buckles allow for micro-adjustments, while the power strap (a wide Velcro strap at the top of the cuff) helps to cinch down the upper part of the boot, providing better shin contact and forward lean control. Proper buckling technique is important – don't just crank them down! You want them snug enough to hold your foot without cutting off circulation or creating pressure points.
The Cuff The Upper Part of the Boot
The cuff wraps around your lower leg and shin. Its height and stiffness (flex) are crucial for support and power transmission. A well-fitting cuff should hold your lower leg securely without pinching or causing excessive pressure on your shin. The forward lean of the cuff also plays a significant role in your athletic stance on skis.
The Golden Rules of Ski Boot Fitting What to Look For
Alright, let's get down to the nitty-gritty of what a good fit feels like and what to avoid.
Snug Not Tight The Ideal Sensation
When you first put on a new ski boot, it should feel snug, almost a little too tight, especially around the instep and heel. Your toes might lightly brush the end. This is normal! As you flex forward into a skiing stance, your heel will settle back, and your toes should pull away slightly from the front. You want a firm, even pressure around your foot, not specific pressure points.
Heel Hold The Key to Control
This is arguably the most critical aspect of a good fit. Your heel should be locked down with minimal lift when you flex forward. If your heel lifts significantly, you lose control and efficiency. This is where many common fit issues stem from, leading to shin bang or general sloppiness.
Toe Wiggle Room A Little Space is Good
While your toes might touch the end when standing upright, once you flex forward, you should have enough room to wiggle them. You don't want them cramped or curled. This ensures circulation and comfort.
No Pressure Points Identifying Hot Spots
This is a big one. Any sharp, localized pain or pressure points are red flags. These can lead to blisters, numbness, or even nerve damage over time. Common pressure points include the ankle bones, navicular bone (top of the foot), and the outside of the little toe. These often require professional boot modifications.
Flex Rating Matching Your Style and Ability
The flex rating indicates how stiff the boot is. Higher numbers mean stiffer boots. Beginners typically need softer flex (around 60-80 for men, 50-70 for women) for easier turn initiation and forgiveness. Advanced skiers need stiffer boots (100+ for men, 80+ for women) for better power transmission and control at high speeds. Don't go too stiff too soon; it will hinder your progress and make skiing exhausting.
Common Ski Boot Fit Issues and Solutions Troubleshooting Your Pain
Even with the best intentions, fit issues can arise. Here's a rundown of common problems and how to address them.
Shin Bang Painful Shins
This is a common and incredibly painful issue where your shin repeatedly bangs against the front of the boot. It's often caused by a boot that's too big, allowing your foot to slide forward, or a boot that's too stiff for your ability, forcing you to over-flex. Solutions include adding a spoiler behind the liner, using custom footbeds to stabilize the foot, or in some cases, getting a softer flexing boot.
Numb Toes or Cold Feet Circulation Problems
Often a sign that your boots are too tight, especially across the instep or forefoot, restricting blood flow. It can also be caused by socks that are too thick. Solutions involve loosening buckles, getting the shell stretched in specific areas, or using thinner, performance-oriented ski socks.
Heel Lift Loss of Control
As mentioned, this is a major performance killer. If your heel lifts, you lose direct control over your skis. Solutions include custom footbeds to fill negative space, J-bars (foam inserts that wrap around the ankle bones inside the liner), or a smaller shell size if the current one is too large.
Ankle Bone Pressure Bony Protrusions
Your ankle bones (malleoli) are often prominent and can rub uncomfortably against the boot shell. This is a classic spot for boot stretching or 'punching out' by a professional boot fitter. They use specialized tools to heat and expand the plastic shell in that specific area.
Arch Pain or Instep Pressure High Arches
If you have high arches, the top of your foot (instep) can feel crushed. This can lead to numbness or sharp pain. Solutions include grinding down the boot board (the plastic piece under the liner), stretching the instep area of the shell, or using custom footbeds that support the arch without adding too much volume.
The Role of a Professional Boot Fitter Your Best Friend on the Slopes
While this guide provides a lot of information, nothing beats the expertise of a professional ski boot fitter. These individuals are highly trained specialists who understand foot anatomy, biomechanics, and boot technology. They have the tools and knowledge to diagnose fit issues and perform precise modifications.
Why See a Boot Fitter The Value Proposition
A good boot fitter will spend significant time with you, assessing your foot shape, ankle flexibility, skiing ability, and preferences. They'll perform a shell check, recommend appropriate boot models, and then customize the fit using various techniques like heat molding, shell punching, grinding, and custom footbeds. This personalized service is invaluable and can transform your skiing experience.
What to Expect During a Fitting Session The Process
Expect to spend anywhere from 1 to 3 hours with a boot fitter. They'll start by measuring your feet (length, width, volume), asking about your skiing history and goals. They'll then perform a shell check, try different boot models, and once a suitable boot is found, they'll begin the customization process, which often includes heat molding the liners and potentially making shell modifications.
Custom Solutions Beyond Off-the-Shelf
Sometimes, an off-the-shelf boot isn't enough. That's where custom solutions come in.
Custom Footbeds The Foundation of Support
These are perhaps the most impactful upgrade you can make to your ski boots. Custom footbeds (or insoles) support your arch and stabilize your foot, preventing it from pronating or supinating excessively. This improves power transmission, reduces fatigue, and eliminates many common pressure points. They are molded precisely to the contours of your foot. Brands like Superfeet (pre-made, but good starting point), Sidas, and Conform'able offer excellent custom options. Expect to pay anywhere from $50 for a good off-the-shelf insole to $200+ for fully custom molded ones.
Liner Customization Heat Molding and Injected Liners
Most modern liners are heat-moldable. This process involves heating the liner in a special oven, then putting it on your foot inside the shell, and letting it cool and mold to your foot's shape. For the ultimate custom fit, some boots allow for foam-injected liners (e.g., Intuition, ZipFit). These liners are filled with a dense foam that conforms perfectly to your foot, offering unparalleled precision and comfort. They are more expensive but can extend the life of your boots and provide a truly custom feel.
Shell Modifications Punching, Grinding, and Stretching
This is where the boot fitter's expertise truly shines. Using specialized tools, they can heat and stretch specific areas of the plastic shell to accommodate bony prominences or wider feet. They can also grind down parts of the boot board or shell to create more volume where needed. These modifications are permanent and should only be done by a professional.
Top Ski Boot Brands and Models A Glimpse at What's Out There
While fit is king, certain brands and models are known for specific characteristics or cater to different foot shapes. Remember, these are just starting points; always try them on!
Atomic Hawx Series For Medium to Narrow Feet
Atomic Hawx boots are renowned for their comfortable fit right out of the box, often suiting medium-volume feet. They feature Memory Fit technology, which allows for heat molding of the shell, cuff, and liner for a truly personalized fit. The Hawx Ultra is great for narrow feet, Prime for medium, and Magna for wider feet. Prices typically range from $400 to $900.
Salomon S/Pro Series Comfort and Performance
Salomon's S/Pro series is a popular choice, known for its excellent balance of comfort and performance. They often feature a seamless liner and Custom Shell HD technology, allowing for quick and effective shell molding. They tend to fit a medium-volume foot well. The S/Pro MV (medium volume) and HV (high volume) cater to different foot widths. Prices are generally between $450 and $850.
Rossignol Alltrack and Speed Series Versatility
Rossignol offers a range of boots, with the Alltrack series being popular for its walk mode, making it versatile for resort and some light touring. The Speed series focuses on performance. They often have a more anatomical fit and can be good for various foot shapes depending on the specific model. Prices range from $350 to $750.
Lange RX and LX Series Precision and Power
Lange boots are often favored by advanced and expert skiers for their precise fit and excellent power transmission. The RX series is a high-performance option, while the LX series offers a more comfortable, wider fit. They are known for their consistent flex and strong connection to the ski. Expect prices from $500 to $950.
Tecnica Mach1 and Cochise Series Performance and Fit
Tecnica's Mach1 series is highly regarded for its customizable fit, featuring C.A.S. (Custom Adaptive Shape) technology in both the shell and liner, allowing for extensive punching and grinding. The Cochise series adds a walk mode for freeride and touring. They offer models for low, medium, and high volume feet. Prices typically fall between $550 and $1000.
Nordica Speedmachine and Sportmachine Series Comfort and Control
Nordica boots, particularly the Speedmachine and Sportmachine lines, are known for their comfortable fit and good performance. They often feature Infrared Technology for easy shell customization. The Speedmachine is a performance-oriented boot, while the Sportmachine offers a more relaxed fit for comfort-focused skiers. Prices range from $400 to $800.
Beyond the Boots Socks and Accessories
Don't overlook the importance of your socks and other accessories in achieving the perfect fit.
Ski Socks The Unsung Hero
Forget thick cotton socks! They bunch up, restrict circulation, and make your feet cold. Invest in thin, performance-oriented ski socks made from merino wool or synthetic blends. These materials wick moisture, provide warmth without bulk, and prevent blisters. Brands like Smartwool, Darn Tough, and Icebreaker are excellent choices. A good pair costs around $20-30.
Boot Heaters Keeping Toes Toasty
If you suffer from chronically cold feet, boot heaters are a lifesaver. These systems typically involve a heating element that adheres to your footbed or is integrated into a custom footbed, powered by a rechargeable battery pack. Brands like Therm-ic and Hotronic offer reliable systems. Prices range from $150 to $300.
Boot Dryers Essential for Longevity and Hygiene
Never put your feet into damp boots! A boot dryer circulates warm air to dry out your liners overnight, preventing odor and extending the life of your boots. They are a relatively inexpensive investment (around $40-80) that pays dividends in comfort and boot longevity.
Maintaining Your Ski Boots Extending Their Life
Once you've got that perfect fit, you want to keep your boots in top shape.
Buckle Them Up When Not in Use
Always buckle your boots loosely when you're not wearing them. This helps them retain their shape and prevents the plastic from deforming over time.
Store Them Properly
Store your boots in a cool, dry place, away from direct sunlight or extreme heat. Use a boot dryer after each use to ensure they are completely dry before storage.
Regular Inspection
Periodically check your buckles, power straps, and soles for wear and tear. Replace worn parts as needed. If your soles are excessively worn, they can affect the binding's release mechanism, so consider replacing them or getting them ground flat by a shop.
Getting the right ski boot fit is a journey, not a one-time event. Your feet change, and your boots will break in. Don't be afraid to revisit a boot fitter if new issues arise. A comfortable, well-fitting pair of ski boots will truly transform your time on the mountain, allowing you to focus on your turns, enjoy the scenery, and make the most of every single run. Happy skiing!
:max_bytes(150000):strip_icc()/277019-baked-pork-chops-with-cream-of-mushroom-soup-DDMFS-beauty-4x3-BG-7505-5762b731cf30447d9cbbbbbf387beafa.jpg)