Improve your snowboard's grip and turning with proper edge tuning. A guide to maintaining sharp edges.
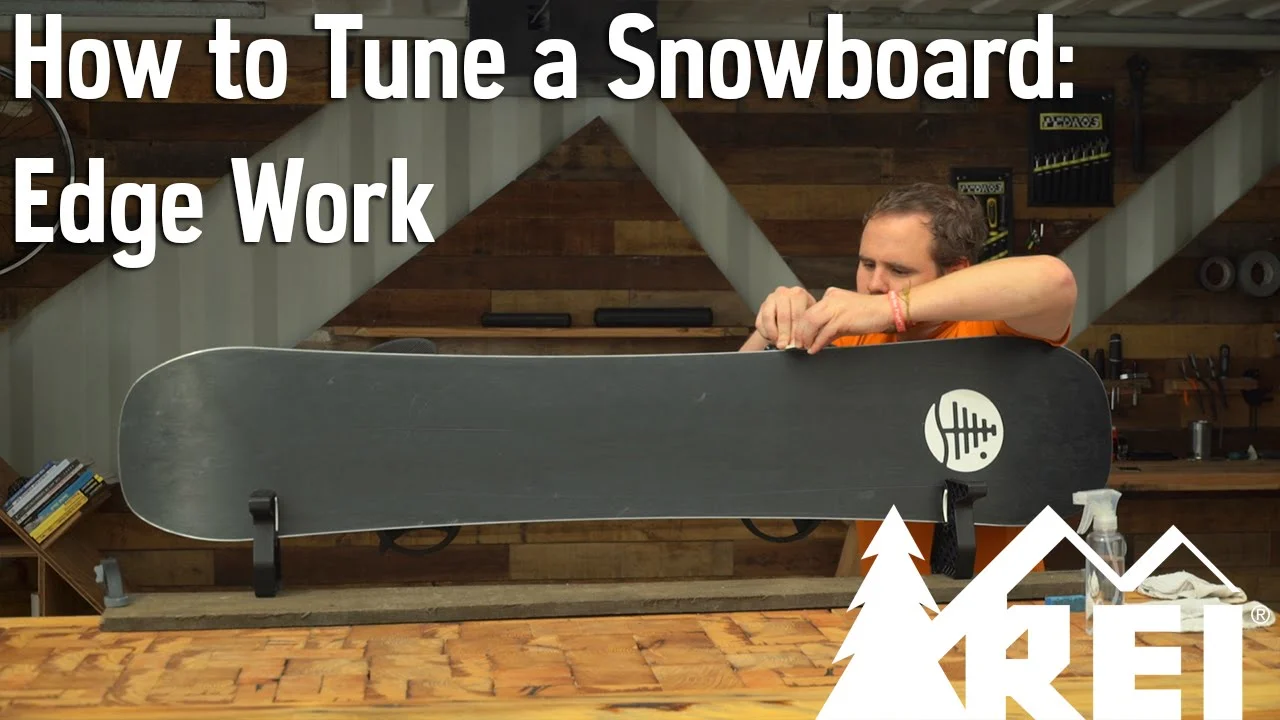
Snowboard Edge Tuning for Grip
Alright, let's talk about snowboard edges. They're probably one of the most overlooked parts of a snowboard, but they're absolutely crucial for how your board performs. Think about it: your edges are what connect you to the snow, giving you grip, control, and the ability to carve those beautiful turns. If your edges are dull, burred, or rusty, you're going to feel like you're sliding around on ice, even on perfectly groomed corduroy. That's not fun, and it's definitely not safe. So, learning how to properly tune your snowboard edges isn't just about making your board feel better; it's about enhancing your safety and overall enjoyment on the mountain.
This guide is going to walk you through everything you need to know about keeping your edges sharp and ready for action. We'll cover why edge tuning matters, what tools you'll need, and a step-by-step process to get your board feeling like new. Whether you're a seasoned rider looking to fine-tune your setup or a beginner trying to understand the basics, this information will help you get the most out of your snowboard.
Why Snowboard Edge Tuning Matters for Performance and Safety
You might be wondering, 'Do I really need to tune my edges?' The short answer is a resounding yes! Sharp edges are fundamental to good snowboarding. They provide the necessary grip to hold an edge on hardpack and ice, allowing you to carve with precision and confidence. Without sharp edges, your board will wash out easily, especially at speed or on steeper terrain. This not only makes turning difficult but also significantly increases your risk of falling. Imagine trying to stop on a dime with dull edges – it's just not going to happen.
Beyond just grip, properly tuned edges also contribute to the overall feel and responsiveness of your board. When your edges are smooth and sharp, your board will transition more fluidly from edge to edge, making turns feel effortless and controlled. This is especially noticeable when you're trying to link turns or ride switch. Dull edges, on the other hand, can make your board feel sluggish and unpredictable, taking away from the joy of riding.
Regular edge tuning also helps maintain the longevity of your snowboard. By removing burrs and rust, you prevent further damage to the metal edges. It's a bit like regular maintenance on your car – a little effort now saves a lot of trouble (and money) down the road. So, investing a little time in edge tuning is a smart move for any snowboarder.
Essential Tools for Snowboard Edge Tuning Kit
Before you dive into tuning, you'll need to gather a few essential tools. Don't worry, you don't need a professional workshop. Most of these items are relatively inexpensive and will last you a long time. Here's a breakdown of what you'll need:
Edge Tuning Files and Guides for Snowboard Sharpening
- Edge File: This is the primary tool for sharpening your edges. You'll want a good quality steel file, typically 8 or 10 inches long. Look for a file with a fine or medium cut for general tuning.
- File Guide (Edge Bevel Tool): This is absolutely crucial for setting the correct edge angle. File guides come in various fixed angles (e.g., 88, 89, 90 degrees) or adjustable versions. For most recreational riders, an 89-degree side edge angle is a good starting point, offering a balance of grip and forgiveness.
- Diamond Files: These are used for polishing and deburring your edges after filing. They come in different grits (coarse, medium, fine). A medium and a fine diamond file are usually sufficient.
- Gummy Stone (Gummi Stone): This soft abrasive block is used for removing burrs, rust, and detuning the tips and tails of your board. It's a must-have for a smooth finish.
Additional Snowboard Tuning Supplies for Edge Maintenance
- Vise or Snowboard Tuning Bench: While not strictly necessary for a quick touch-up, a good vise or tuning bench will make the process much easier and more stable. It holds your board securely in place.
- Rubbing Alcohol or Citrus Cleaner: For cleaning your edges before and after tuning.
- Clean Rags or Paper Towels: For wiping away debris and cleaning.
- Permanent Marker: Useful for checking your progress when filing.
- Edge Deburrer (Optional but Recommended): A small tool specifically designed to remove burrs from the edges.
Step by Step Snowboard Edge Tuning Process for Optimal Grip
Alright, let's get down to business. Here's a step-by-step guide to tuning your snowboard edges. Take your time, be patient, and you'll get great results.
Preparation and Cleaning Snowboard Edges
- Secure Your Board: Place your snowboard securely in a vise or on a tuning bench, with the base facing up. Make sure it's stable and won't move around while you're working.
- Clean the Edges: Use rubbing alcohol or a citrus cleaner and a clean rag to thoroughly clean your edges. Remove any dirt, grime, old wax, or rust. Clean edges are essential for the files to work effectively.
- Inspect for Damage: Run your finger along the edges (carefully!) and visually inspect them for any major burrs, nicks, or rust spots. Pay attention to any areas that feel rough or look discolored.
Side Edge Sharpening Techniques for Snowboarders
The side edge is the vertical part of your edge that bites into the snow when you're on edge. This is where most of your grip comes from.
- Set Your Angle: Attach your file to your file guide. For most recreational riders, an 89-degree side edge angle is a great starting point. This means the edge will be 1 degree off perpendicular to the side of the board. Some advanced riders prefer an 88-degree angle for more aggressive grip, but it requires more maintenance.
- Mark the Edge: Use a permanent marker to color the entire length of the side edge you're working on. This will help you see where you're filing and ensure you're hitting the entire edge evenly.
- File the Edge: Place the file guide flat against the sidewall of your snowboard, with the file resting on the edge. Apply even, consistent pressure and push the file from tip to tail in long, smooth strokes. Don't saw back and forth. After each stroke, check the marker. You want to see the marker completely removed along the entire length of the edge, indicating you've filed that section.
- Repeat and Refine: Continue filing until the entire side edge is clean and sharp. You'll feel the file bite into the metal, and you should see fine metal shavings. Once you've done one side, flip the board and repeat the process on the other side.
Base Edge Beveling for Smooth Turns
The base edge is the horizontal part of your edge that sits against the base of your board. A slight bevel here helps prevent the edge from catching unnecessarily, making turns smoother and less 'hooky'.
- Determine Your Base Bevel: Most snowboards come with a 1-degree base bevel from the factory. This is a good all-around angle. Some riders prefer a 0.5-degree bevel for maximum grip, while others might go up to 2 degrees for a more forgiving ride, especially for jibbing or park riding. For general carving, 1 degree is ideal. You'll need a specific base edge bevel tool for this.
- Mark and File: Similar to the side edge, mark the base edge with a permanent marker. Place your base bevel tool (with the file attached) flat on the base of your board, with the file resting on the edge. Push the file from tip to tail in smooth, consistent strokes. Again, check the marker to ensure you're filing evenly.
- Deburr: After filing both the side and base edges, you'll likely have a small burr (a tiny curl of metal) on the very tip of the edge. This is normal. Use your gummy stone or a dedicated edge deburrer to gently remove this burr. Run the gummy stone along the edge a few times, applying light pressure. You want the edge to feel smooth and sharp, not rough.
Polishing and Detuning Snowboard Edges for Optimal Feel
This step refines the edge and prepares it for riding.
- Diamond File Polish: Take your medium grit diamond file (attached to your file guide for the side edge, or freehand for the base edge) and run it along the edges, using light pressure. This removes any microscopic burrs left by the steel file and polishes the edge. Follow up with a fine grit diamond file for an even smoother finish.
- Detuning Tips and Tails: This is a crucial step, especially for beginners or anyone who doesn't want their board to feel too 'grabby'. Use your gummy stone to gently round off the very tips and tails of your edges (about 5-10 cm from each end). This prevents the edges from catching unexpectedly when you're initiating turns or riding flat base. You want to remove just enough sharpness so that the edge doesn't feel razor-sharp in these areas.
- Final Wipe Down: Give your edges one last wipe with a clean rag to remove any metal dust or debris.
Recommended Snowboard Edge Tuning Products and Kits
There are many great tuning products out there, ranging from basic individual tools to comprehensive kits. Here are a few recommendations, keeping different budgets and needs in mind:
Beginner Friendly Snowboard Edge Tuning Kits
If you're just starting out, a complete kit is often the most cost-effective way to get all the essentials.
- Demon Complete Tune Kit: This is a popular choice for beginners. It usually includes an edge tuner (often adjustable for multiple angles), a file, a diamond stone, a gummy stone, wax, a scraper, and a brush. It's a great all-in-one solution to get you started. The adjustable edge tuner is a big plus for trying different angles.
- Swix Universal Ski and Snowboard Tuning Kit: Swix is a well-respected brand in the ski and snowboard world. Their universal kits often come with a good quality file, an edge guide, a diamond stone, and a gummy stone. While it might not include wax, the quality of the edge tools is excellent.
Advanced Snowboard Edge Tuning Tools for Precision
For those who want more precision and durability, investing in individual high-quality tools is the way to go.
- Toko Express Tuner: This is a fantastic handheld tool for quick and accurate edge sharpening. It allows you to set precise side and base edge angles (usually 88/89 degrees for side and 0.5/1 degree for base). It's compact and great for travel or quick touch-ups on the mountain. Price: Around $60-$80 USD.
- Wintersteiger Edge Tuner Pro: If you're serious about tuning and want a professional-grade tool, the Wintersteiger Edge Tuner Pro is top-notch. It offers very precise angle settings and a comfortable grip. It's more of an investment but will last a lifetime. Price: Around $100-$150 USD.
- SKS Multi-Angle Edge Tuner: SKS makes reliable tuning tools. Their multi-angle edge tuner is a versatile option that allows you to dial in various side edge angles. It's durable and provides consistent results. Price: Around $40-$60 USD.
- DMT Diamond Files: For the best polishing and deburring, DMT makes some of the highest quality diamond files. They come in various grits (coarse, fine, extra-fine) and are incredibly durable. Price: Around $20-$40 USD per file.
Comparison of Snowboard Edge Tuning Products
When choosing products, consider your skill level, how often you'll be tuning, and your budget.
- Kits vs. Individual Tools: Kits are great for beginners as they provide everything you need to start. However, the quality of individual tools in a kit might not be as high as buying specialized tools separately. If you plan on tuning frequently or want more precision, investing in individual, higher-quality tools is a better long-term strategy.
- Adjustable vs. Fixed Angle Guides: Adjustable file guides offer versatility, allowing you to experiment with different edge angles. Fixed-angle guides are simpler and often more precise for a specific angle, but you'd need multiple guides if you want to try different angles. For most riders, an adjustable guide or a fixed 89-degree guide is sufficient.
- Price vs. Quality: As with most things, you generally get what you pay for. Cheaper files might dull faster or not provide as clean a cut. Higher-end diamond files will last longer and give a superior finish. However, even budget-friendly options can get the job done if used correctly.
When to Tune Your Snowboard Edges for Peak Performance
How often should you tune your edges? It really depends on how much you ride, the snow conditions, and your riding style. Here are some general guidelines:
- After Every Few Days of Riding: If you're riding regularly, especially on hardpack or icy conditions, a quick touch-up with a diamond file and gummy stone every 2-3 days of riding can make a big difference.
- When You Notice Loss of Grip: The most obvious sign that your edges need attention is when you start to feel your board slipping or washing out, especially on turns or harder snow.
- Before a Trip: Always give your board a full tune (edges and wax) before a big trip or a long weekend on the slopes. You want your board performing its best when you're on vacation.
- After Hitting Rocks or Rails: If you accidentally hit a rock, rail, or any other obstacle, inspect your edges immediately. You'll likely have burrs or nicks that need to be filed out.
- At the Start of the Season: Give your board a full edge tune at the beginning of each season to get it ready for action.
- Before Storing for the Off-Season: It's a good idea to clean and lightly detune your edges before storing your board for the summer. This helps prevent rust.
Common Snowboard Edge Tuning Mistakes to Avoid
Even with the right tools, it's easy to make mistakes when you're new to tuning. Here are some common pitfalls to avoid:
- Filing Back and Forth: Always push the file in one direction (tip to tail). Filing back and forth creates an uneven edge and can dull your file faster.
- Applying Too Much Pressure: You don't need to press down with all your might. Consistent, moderate pressure is more effective and prevents gouging the edge.
- Not Using a File Guide: Trying to freehand file your edges is a recipe for disaster. You'll end up with inconsistent angles and a board that doesn't perform well. Always use a file guide.
- Forgetting to Detune Tips and Tails: A common mistake that leads to a 'hooky' feeling board, especially for beginners. Always detune the contact points.
- Ignoring Base Edge Bevel: While the side edge gets most of the attention, a proper base edge bevel is crucial for smooth turn initiation and release.
- Not Cleaning Edges: Dirt, old wax, and rust will clog your files and prevent them from working effectively. Always clean your edges first.
- Using a Dull File: A dull file is useless. If your file isn't biting into the metal, it's time for a new one.
Beyond the Basics Advanced Snowboard Edge Tuning Tips
Once you've mastered the basics, you might want to explore some more advanced tuning concepts:
- Varying Edge Angles: Some riders like to experiment with different side edge angles. A steeper angle (e.g., 88 degrees) provides more aggressive grip, ideal for hardpack and ice, but can be less forgiving. A more forgiving angle (e.g., 90 degrees) is better for park riding or beginners.
- Edge Tapering: For very advanced riders, tapering the edge sharpness can be beneficial. This involves making the edge sharper underfoot and slightly less sharp towards the tips and tails. This is a more advanced technique and usually requires specialized tools or professional help.
- Ceramic Stones: For an even finer polish than diamond files, some tuners use ceramic stones. These are great for achieving a mirror-like finish on your edges.
- Professional Tuning: While DIY tuning is great, don't hesitate to take your board to a professional shop for a full tune-up once or twice a season. They have specialized machinery and expertise to get your board in top shape.
So, there you have it! Tuning your snowboard edges might seem a bit daunting at first, but with the right tools and a little practice, you'll be able to keep your board performing at its best. A sharp edge isn't just about speed; it's about control, confidence, and ultimately, having more fun on the mountain. So grab your tools, get to work, and enjoy those perfectly carved turns!
:max_bytes(150000):strip_icc()/277019-baked-pork-chops-with-cream-of-mushroom-soup-DDMFS-beauty-4x3-BG-7505-5762b731cf30447d9cbbbbbf387beafa.jpg)